


Building the wooden blocks
The first step in construction involves selecting the wood to assemble carving “blanks” or the seven or eight pieces that will become the finished figure. This includes
the head, body, neck, four legs and the tail. The wood is kiln-dried basswood used primarily because it is light in weight, very strong and relatively easy to carve.
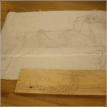
Each figure requires about 120 board feet of wood. We select the wood to be sure grains line up and the flow of grain is continuous throughout the body. From the
sketch of the figure, we cut pieces of wood to match the size of the legs, tail, head, etc.
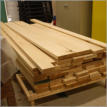
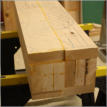
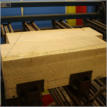

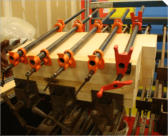
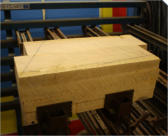
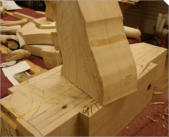
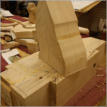
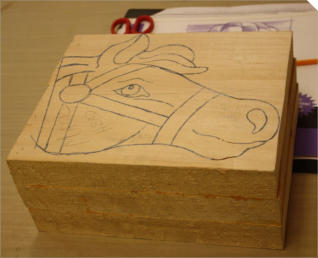
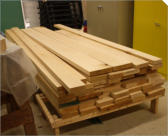
The process begins with boards of basswood. They need to be glued together in order to create the blocks.

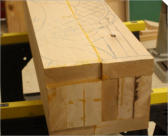
Gluing and Sketching the Blanks
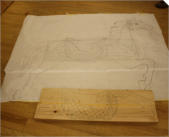
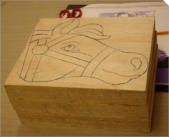
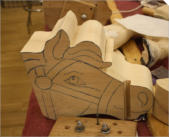
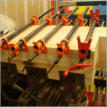
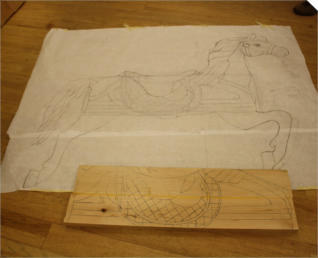
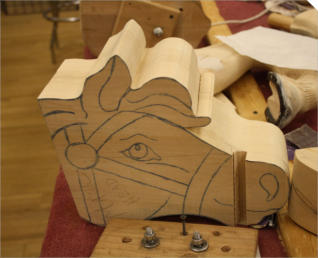
To form this body blank, the wood is glued and clamped. Once the body blank has dried, we transfer the drawing onto the wooden blanks. With a band saw we then
do a silhouette cut of the figure and also drill a hole for the carousel pole. Other holes are made for attachment of the other wooden blanks, like the legs, tail, neck
and head.
The carved pieces are then sanded and attached using wooden dowels and strong glue. Nails are not used in the construction of carousel horses as the metal
invites moisture contributing to decay and insect damage to the wood.
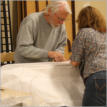
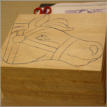

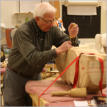
Ken works with Teri to carefully transfer the full size drawing to the body blank.
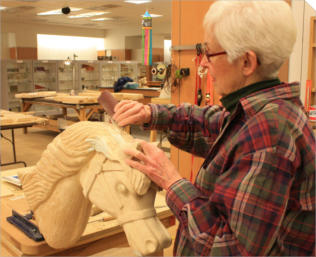
Rough Carving begins on the blocks
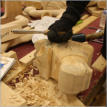
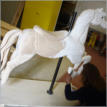
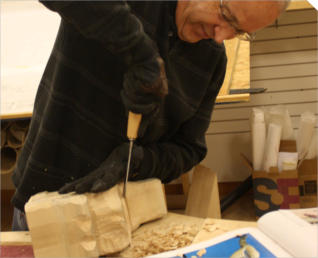
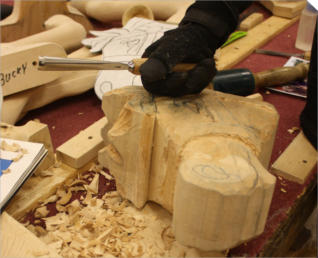
Our carvers begin with power grinders to remove much of the excess wood before hand carving begins. Then we start “rough carving,” which involves skillful use of
sharp chisels and gouges to begin to shape the figure.
Care is necessary not to remove too much wood in the detail work. If too much wood is left on will result in a boxy look and
not reflect the true anatomical appearance of the horse.
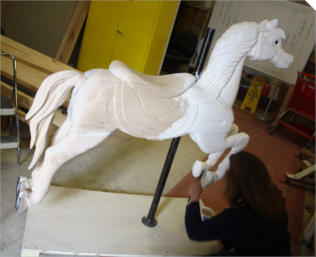
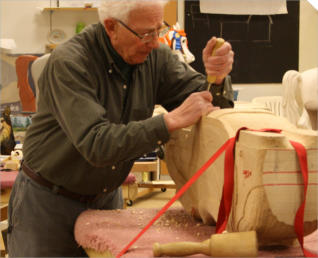
Our carving blanks are carved before we join them together. It is less cumbersome to carve the pieces before joining them. To carve each piece, we secure them in
a vise and / or clamp.
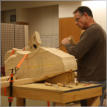
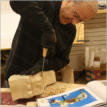

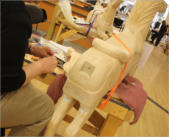
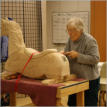
Phil straps the block down in the carving shop and takes the first chunks of wood out of Magic.
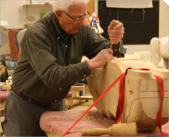
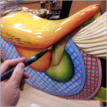
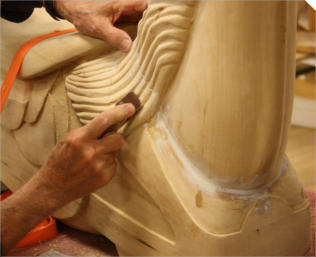
Detailed Carving
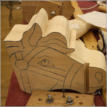
Our team of experienced carvers help the new carvers in keeping figures in the right proportions as the carving proceeds. Once the rough carving is completed the
detailed carving begins including the trappings (the detail on and around the saddle), smaller figures and other items designed to appear on the final figure.
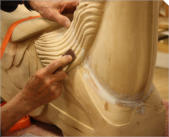
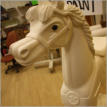
The most intricate parts to be carved by more experienced carvers are the mane and the face. Carvers gain initial experience in doing flowers and other ornamental
designs.
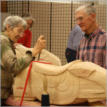


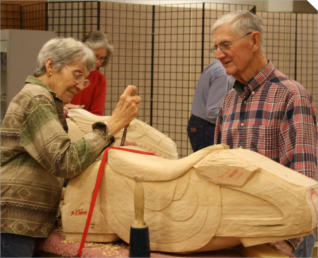
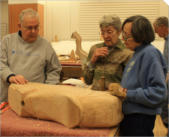
Phyllis and Ed discuss progress on Magic the horse.

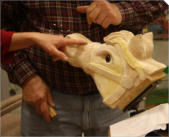
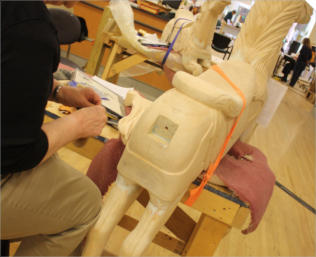
Assembly & Fine Sanding
Once the individual parts are carved and individually sanded, they are assembled with dowels, glue and clamps. The seams are shaped and smoothed, giving the
figure a smooth flawless appearance and preparing it for final sanding phase.
The horses are put together in stages. Usually the head is attached and glued to the neck first. Then the neck is attached
and glued to the body block. Then when all of that is properly sanded the legs and tail are glued to the body block.


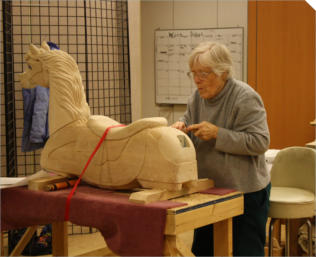
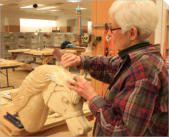
As Magic moves along in the carving shop the horse also needs to have sanding.

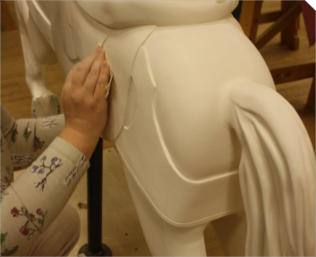
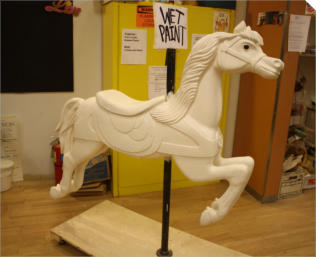
Priming the wooden horse
The gluing of the horse is completed and the fine sanding is completed. Then the horse is inspected and if smooth enough the horse is ready to be primed. We
paint on an initial primer right onto the wood. Then we do sanding of the horse with the primer on it. The next step is a a few more coats of a white primer with
additional fine sanding between each coat that is put onto the horse.
After the horse has been thoroughly inspected by supervisors and is smooth enough it is handed over to the paint shop for the next step in the process.
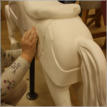
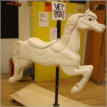
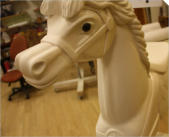
Teri begins priming the wooden horse with primer that is specifically designed to soak into the wood work.
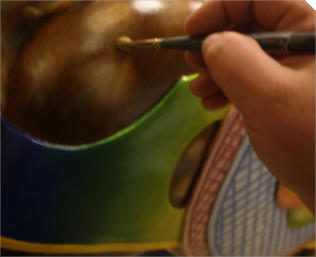
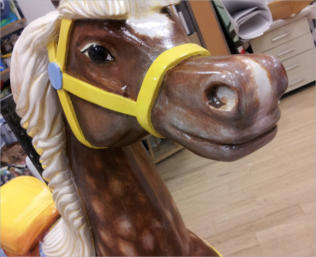
Color Painting
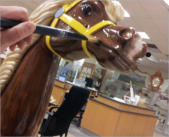
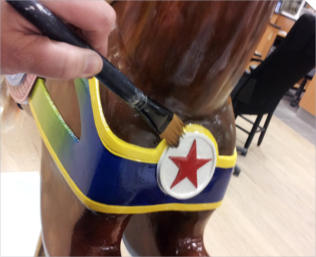
Before our artists begin painting of the horse, we carefully plan out all aspects of the paint job. A color scheme is chosen and a swatch palette is established.
We use enamel paints on the trappings. Applying three coats and letting the paint dry and cure between each application. Some of horses we will add jewels to
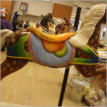
before the final painting occurs. Body colors are done after trappings. Oil paints are dabbed & stippled to create soft shading that gives the horse a 3-D look. The
more the fine detail, the more exquisite the horse.
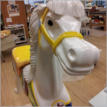
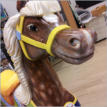

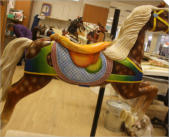
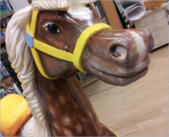
Magic gets a wonderful coat of white in the paint shop before he gets his body painted.

Clear coating the horse
Following the completed horse painting, we apply by hand with brush the two to three coats of a clear coat over the finished paint (allowing time for curing and
sanding between each coat).
These coats add luster to the horse and protect the paint from wear. More coats are usually added to the trappings where
the horse will have more contact with the riders. The end result
is a very shiny and beautiful horse.
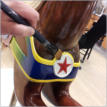

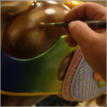
Magic’s colorful paint job has dried and now he begins the clear coating process.
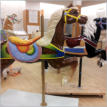
Workshop
The Workshop is a wonderful place where creation begins for all of our horses.
The horses begin as wooden basswood boards which are cut to size, glued together,
clamped and dried on metal racks. After drying is completed then patterns are
transferred to the blocks and they are ready for carving.


© 2014 The Berkshire Carousel Photos © 2014 Katy Levesque / All rights reserved Website design by KatyIllustrator


Building the wooden blocks
The first step in construction involves selecting the wood to assemble carving “blanks”
or the seven or eight pieces that will become the finished figure. This includes the
head, body, neck, four legs and the tail. The wood is kiln-dried basswood used
primarily because it is light in weight, very strong and relatively easy to carve. Each
figure requires about 120 board feet of wood. We select the wood to be sure grains
line up and the flow of grain is continuous throughout the body. From the sketch of the
figure, we cut pieces of wood to match the size of the legs, tail, head, etc.


The process begins with boards of basswood. They need to be glued
together in order to create the blocks.

Gluing and Sketching the Blanks
To form this body blank, the wood is glued and clamped. Once the body blank has
dried, we transfer the drawing onto the wooden blanks. With a band saw we then do a
silhouette cut of the figure and also drill a hole for the carousel pole. Other holes are
made for attachment of the other wooden blanks, like the legs, tail, neck and head.
The carved pieces are then sanded and attached using wooden dowels and strong
glue. Nails are not used in the construction of carousel horses as the metal invites
moisture contributing to decay and insect damage to the wood.


Ken works with Teri to carefully transfer the full size drawing to the
body blank.

Rough Carving begins on the blocks
Our carvers begin with power grinders to remove much of the excess wood before
hand carving begins. Then we start “rough carving,” which involves skillful use of sharp
chisels and gouges to begin to shape the figure.
Care is necessary not to remove too much wood in the detail work. If too much wood is
left on will result in a boxy look and
not reflect the true anatomical appearance of the horse.
Our carving blanks are carved before we join them together. It is less cumbersome to
carve the pieces before joining them. To carve each piece, we secure them in a vise
and / or clamp.


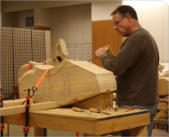
Phil straps the block down in the carving shop and takes the first
chunks of wood out of Magic.

Detailed Carving
Our team of experienced carvers help the new carvers in keeping figures in the right
proportions as the carving proceeds. Once the rough carving is completed the detailed
carving begins including the trappings (the detail on and around the saddle), smaller
figures and other items designed to appear on the final figure.
The most intricate parts to be carved by more experienced carvers are the mane and
the face. Carvers gain initial experience in doing flowers and other ornamental
designs.


Phyllis and Ed discuss progress on Magic the horse.
Assembly & Fine Sanding
Once the individual parts are carved and individually sanded, they are assembled with
dowels, glue and clamps. The seams are shaped and smoothed, giving the figure a
smooth flawless appearance and preparing it for final sanding phase.
The horses are put together in stages. Usually the head is attached and glued to the
neck first. Then the neck is attached
and glued to the body block. Then when all of that is properly sanded the legs and tail
are glued to the body block.


As Magic moves along in the carving shop the horse also
needs to have sanding.

Priming the wooden horse
The gluing of the horse is completed and the fine sanding is completed. Then the
horse is inspected and if smooth enough the horse is ready to be primed. We paint on
an initial primer right onto the wood. Then we do sanding of the horse with the primer
on it. The next step is a a few more coats of a white primer with additional fine sanding
between each coat that is put onto the horse.
After the horse has been thoroughly inspected by supervisors and is smooth enough it
is handed over to the paint shop for the next step in the process.


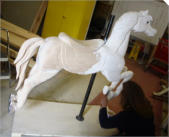
Teri begins priming the wooden horse with primer that is
specifically designed to soak into the wood work.

Color Painting
Before our artists begin painting of the horse, we carefully plan out all aspects of the
paint job. A color scheme is chosen and a swatch palette is established.
We use enamel paints on the trappings. Applying three coats and letting the paint dry
and cure between each application. Some of horses we will add jewels to before the
final painting occurs. Body colors are done after trappings. Oil paints are dabbed &
stippled to create soft shading that gives the horse a 3-D look. The more the fine
detail, the more exquisite the horse.


Magic gets a wonderful coat of white in the paint shop
before he gets his body painted.

Clear coating the horse
Following the completed horse painting, we apply by hand with brush the two to three
coats of a clear coat over the finished paint (allowing time for curing and sanding
between each coat).
These coats add luster to the horse and protect the paint from wear. More coats are
usually added to the trappings where
the horse will have more contact with the riders. The end result
is a very shiny and beautiful horse.


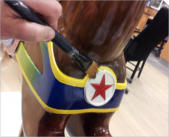
Magic’s colorful paint job has dried and now he begins the
clear coating process.
Workshop
The Workshop is a wonderful place where creation begins for all of our horses.
The horses begin as wooden basswood boards which are cut to size, glued together,
clamped and dried on metal racks. After drying is completed then patterns are
transferred to the blocks and they are ready for carving.